If anyone noticed, these gum sliders coordinate with the post-it pads I just did. Wouldn't these make cute little gifts!?!?


 If anyone noticed, these gum sliders coordinate with the post-it pads I just did. Wouldn't these make cute little gifts!?!?

 I think these would also make super cute Easter basket fillers!

 Or you could create matching cards, full-size notepads, gift tags, etc...and have a coordinating stationery set!


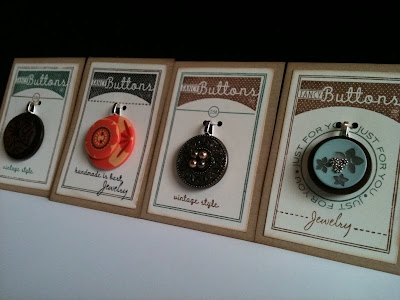 Here's how I started - you need buttons, embellishments (I used beads), jewelry bales (the silver hoop thingy that your necklace slides through), strong adhesive (I use E6000), and some card stock, ink, and stamps for the "packaging".